Why create a Google Analytics 4 property?
If you have not yet done so, it is important to create a Google Analytics 4 property as soon as possible. And the reason is very simple: Universal Analytics (the old version of Google Analytics) will no longer be supported.
From July 1, 2023, no new data will be received on your old Universal Analytics property. You can still view your old data, but unfortunately you cannot transfer it to the new version. That is why it is important to make the switch to Google Analytics 4 as soon as possible. The earlier you start, the more data you will have in GA4 (on July 1, 2023) to work with.
Google Analytics 4 offers several advantages over Universal Analytics:
- Improved interface (although it does take some time getting used to if you’ve worked with UA a lot).
- Improvements regarding the privacy of visitor data / more compliant with GDPR.
- Google has improved their machine learning algorithm.
- Event tracking has been made easier.
- It becomes easier to track users on different devices.
- Improved integration with Google Ads.
- More flexibility in the standard reports.
How do you create a Google Analytics 4 property?
Do you already use Google Analytics (Universal Analytics)?
If so, follow the steps below to create your Google Analytics 4 property in no time. For anyone who does not yet use Google Analytics, a complete step-by-step plan for creating a Google Analytics Account is provided a little further on in this article. So scroll down a little further for that.
Step 1: Go to Google Analytics and log in with your Google account.
Step 2: Select the Google Analytics account in which you want to create your new Google Analytics 4 property.
Step 3: Then click on ‘Admin’ at the bottom left and then on the ‘+ Create’ button at the top of the side menu on the left side of the screen. You’ll have the option to make a new account or a new property. Assuming you already have a Universal Analytics property for your website, choose to make a new property.
Step 4: Give your property a name and set the ‘reporting time zone’ and ‘currency’ as desired. You don’t need to do anything under ‘Show advanced options’. Here you can create a Universal Analytics property, but if you’re following these steps you should already have one. If you don’t have a Universal Analytics property or another GA4 property yet, scroll towards the part in this article where I focus on creating a GA4 property if there’s no UA property yet.
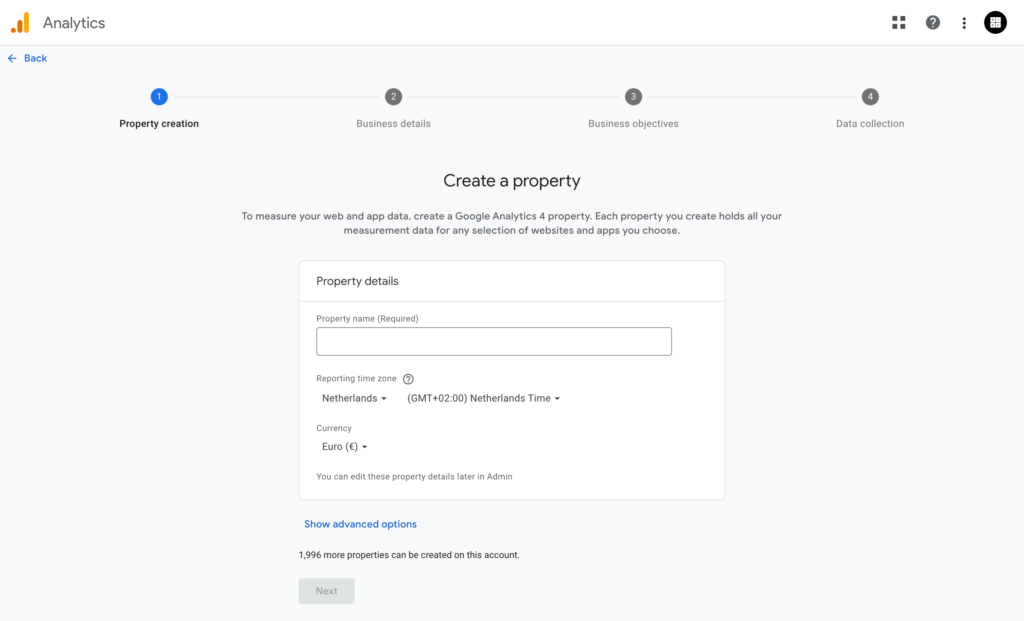
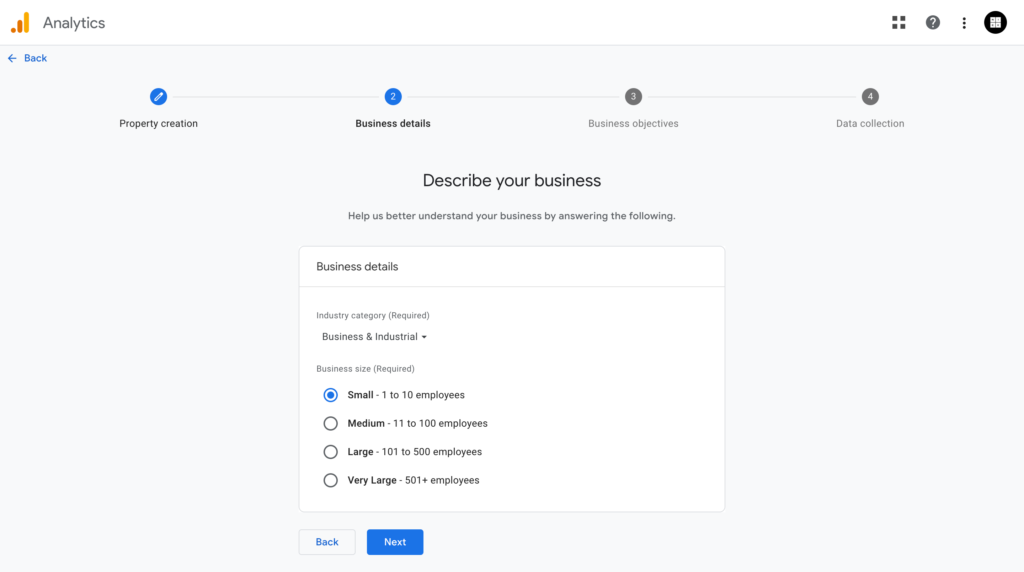
Step 5: Next, select the industry & company size. Google uses this information to form a picture of the target group and which functionalities are important, but these have no further influence on your new property. Click on ‘Create’.
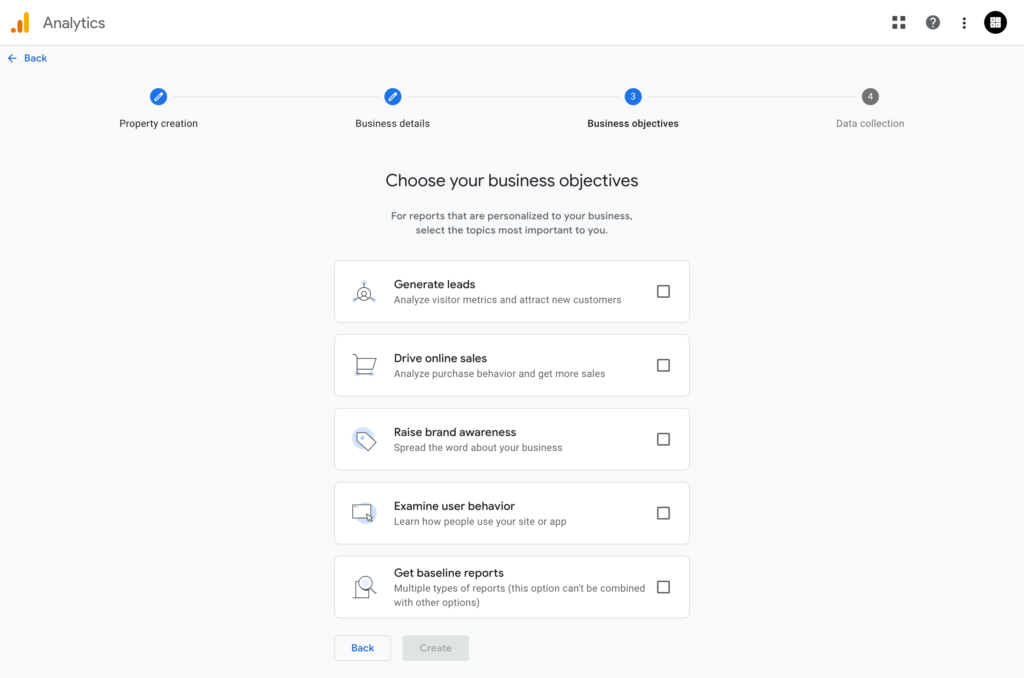
Stap 6: Now, select the goals that apply to you.
Step 7: For the convenience, I will assume that you create a Google Analytics 4 property for your website. If so, then choose the ‘Web’ platform.
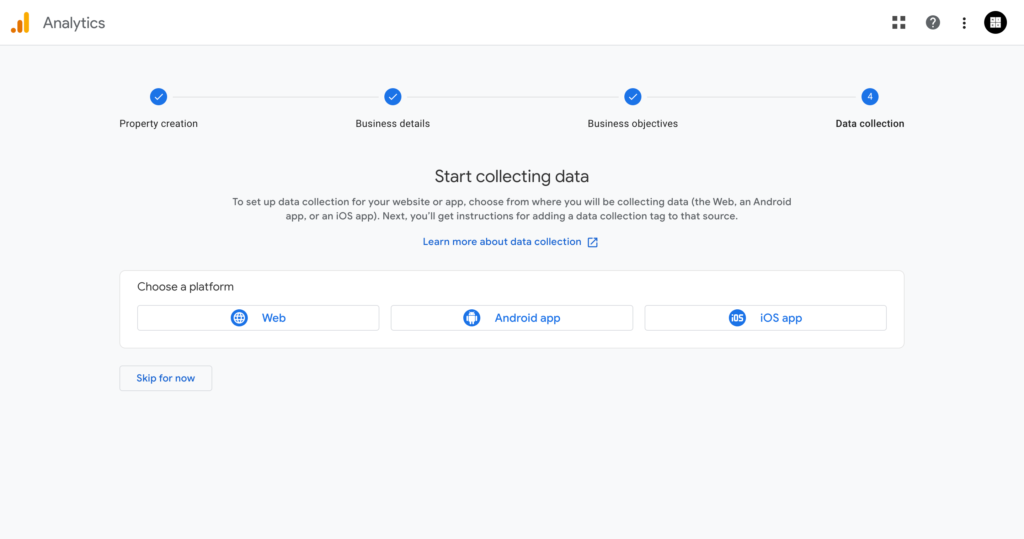
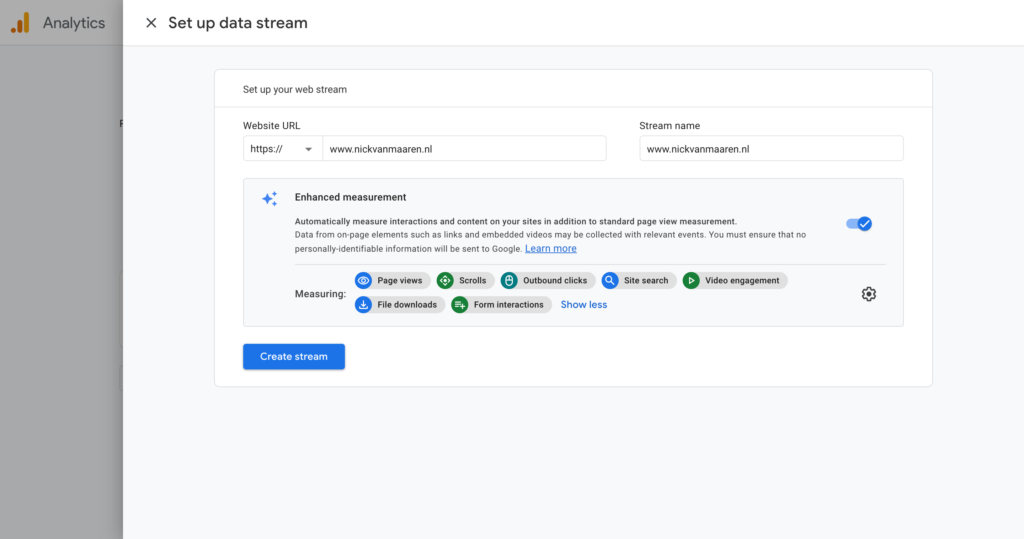
Step 8: Enter the domain name of your website under Website URL, for example: ‘www.nickvanmaaren.nl’ and give a name to the ‘Stream’. Under ‘Enhanced measurement’, select the events you would like to measure. You can leave them all on for convenience. Click on ‘Create stream’.
Step 9: Okay, You’re almost there now! We now have to make sure that the new property will actually receive data. On the screen where you are now you should see ‘View tag instructions’. The instructions basically speak for themselves. In my next blog I will explain step by step how you can load your GA4 property via Google Tag Manager.
Have you not used Google Analytics before?
Step 1: You need a Google account to use Google Analytics. It is important that you are logged in to your Google account before continuing with the next steps.
Step 2: Go to Google Analytics and click on ‘Start measurement’.
Step 3: Enter an account name. Under ‘Data sharing settings for account’ all checkboxes should be unchecked. Then click on ‘Next’.
Step 4: Give your property a name & set the time zone and currency as desired.
Step 5: You don’t need to do anything under ‘Show advanced options’. If you want to do so, you can easily make a Universal Analytics property here. Universal Analytics properties are the old properties and will not gather any after July 1, 2023. Therefore, in this guide I’ll focus on creating only a GA4 property.
Step 6: Next, select the industry, company size, and your goals. Google uses this information to form a picture of the target group and which functionalities are important, but these have no further influence on your new property. Click on ‘Create’.
Step 7: For the sake of convenience, I will assume that you create a Google Analytics 4 property for your website, then choose the ‘Web’ platform.
Step 8: Enter the domain name of your website under Website URL, for example: ‘www.nickvanmaaren.nl’ and give a name to the ‘Stream’. Under ‘Enhanced measurement’, select the events you would like to measure. You can leave them all on for convenience. Click on ‘Create stream’.
Step 9: Okay, you’re almost there now! We now have to make sure that the new property will actually receive data. On the screen where you are now you should see ‘View tag instructions’. The instructions basically speak for themselves. In my next blog I will explain step by step how you can load your GA4 property via Google Tag Manager.